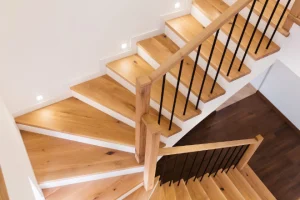
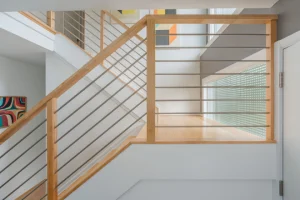
Upgrade the Safety and Aesthetic of Your Staircase
Worried your stairs could use a safety upgrade? Not sure where to start when it comes to adding a handrail that looks good and holds strong?
In this post, you’ll learn exactly how to install a stair railing—from measuring and cutting the rail to attaching it cleanly and securely.
By the end, you’ll know if you want to DIY or hire a professional stair handrail installer.
- Estimated Time: 1–2 hours
- Skill Level: Intermediate
- Tools Needed: Tape measure, stud finder, level, drill/driver, miter saw, hammer
- Materials Needed: Handrail, brackets (one for top, bottom, and every 4 ft), fasteners, wood glue or epoxy, finish nails
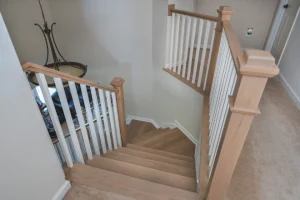
Make sure you know the difference between a railing and a banister.
How to Install a Stair Railing – Quick Overview
- Measure the total length needed for your handrail
- Purchase your handrail and mounting brackets
- Gather your tools and materials
- Locate wall studs where brackets will mount
- Extend vertical stud lines to guide bracket placement
- Mark the proper handrail height along the stairway
- Cut the handrail to your measured length
- Mark bracket locations on the wall
- Attach the brackets securely into wall studs
- Mount the handrail onto the brackets
- Add adhesive for extra hold (optional)
- Sand and finish the handrail (optional)
- Test the stair railing for stability and make final adjustments
Contact us today about your stair railing installation.
1. Measure the Total Length Needed for Your Handrail
Use a tape measure to measure from the stair nosing at the top of the stairs to the floor at the bottom.
Then add about two feet so your stair rail extends slightly past the top and bottom stair treads, giving it a comfortable and code-friendly finish.
2. Purchase Your Handrail and Mounting Brackets
Choose a wood handrail that fits your needs—oak for strength, pine or poplar if you’re painting.
Make sure to buy mounting brackets for the top and bottom, plus one for every 4 feet of length.
Check that they meet local building codes for safety and durability.
Do you know what type of banister you want?
3. Gather Your Tools and Materials
Before starting your handrail installation, collect everything you’ll need.
This includes a stud finder, level, tape measure, miter saw/power miter saw, drill, screws, wood glue, 150-grit sandpaper, and optional finishing supplies like stain or paint.
Keep masking tape nearby if you’re finishing the rail.
4. Locate Wall Studs Where Brackets Will Mount
Use a stud finder to locate the wall studs running beside the stairway.
You’ll need to mount your handrail brackets directly into these studs, so mark the stud centers clearly.
The spacing is typically 16 inches apart.
5. Extend Vertical Stud Lines to Guide Bracket Placement
Using a level or straightedge, draw vertical lines extending upward from your stud marks.
This helps ensure that your stair handrail brackets stay aligned during the mounting process.
6. Mark the Proper Handrail Height Along the Stairway
Measure up vertically from the stair nosing to find the proper handrail height—typically 36 inches.
Mark this height at the top, middle, and bottom of the stairs.
Connect the points with a straight edge or chalk line to guide placement.
7. Cut the Handrail to Your Measured Length
Use a miter saw to cut your stair rail to size.
For a clean edge and a nice finished look, consider mitering the ends at a 45° angle, especially if the ends will be visible and not meet newel posts.
8. Mark Bracket Locations on the Wall
Hold the handrail in place along your marked guideline. Mark where the handrail intersects with each stud line.
This is where you’ll attach your handrail brackets—one near each end and one every 4 feet in between.
9. Attach the Brackets Securely into Wall Studs
Drill into the marked stud lines and use screws to attach the brackets securely.
Each bracket should line up with the handrail height guideline and sit flush with the underside of where the handrail will rest.
10. Mount the Handrail onto the Brackets
Place the handrail onto the installed brackets and position it evenly.
Drill pilot holes if needed.
Then fasten the rail using screws through bracket sleeves or clamps to ensure everything holds tight.
11. Add Adhesive for Extra Hold (Optional)
For added strength during your stair handrail installation, apply wood glue or epoxy where the handrail meets each bracket.
This can help reduce wiggle or long-term loosening.
Just wipe away any excess glue before it dries.
12. Sand and Finish the Handrail (Optional)
Smooth the handrail using 150-grit sandpaper, especially around the edges and any cut areas.
If you plan to stain or paint, apply your finish evenly and let it dry before using the stairs.
13. Test the Stair Railing for Stability and Make Final Adjustments
Once installed, test the staircase handrail by pressing down and pulling gently along its full length.
Tighten any loose screws, double-check that your mounting brackets are secure in the wall studs, and admire your safe new setup.
Let Stair Creations Help Hold You Up
Whether you’re upgrading your stairs for safety or style, Stair Creations can handle your stair railing installation from start to finish. We bring precision and craftsmanship to every Virginia home, making sure your new stair rail is solid, stylish, and built to last.
Don’t leave your staircase support up to guesswork—let us take care of it. To get started, fill out our contact form today or give us a call.