Key Points
- Replacing stair treads starts with proper measuring and prepping for safety and fit.
- Each step in the process builds on the last, from removal to finishing.
- With the right tools and approach, this project can be done in a weekend.
Give Your Steps a Fresh Start
Thinking about swapping out those steps worn down from walking on them a thousand times, coming back from a concert at the EagleBank Arena? Wondering if this is a weekend project or a full-blown renovation? In this post, you’ll learn what replacing stair treads takes from start to finish, with tips for tools, safety, and pro-level results.
By the time you’re done reading, you’ll know how to take your stairs from creaky to clean, with confidence and code compliance built in. Or you’ll want to hire a pro stair installer.
How to Replace Stair Treads Step by Step
- Measure the stair width and depth for accurate tread sizing.
- Remove existing treads carefully without damaging the stringers.
- Inspect and prep the stringers by cleaning, leveling, and repairing any damage.
- Cut new treads to match the measurements using a saw.
- Dry fit each tread to ensure proper alignment.
- Install each tread with construction adhesive and finish nails or screws.
- Fill gaps, sand smooth, and apply your desired finish.
Tools and Materials Checklist
Tools
- Tape measure
- Circular or miter saw
- Drill and driver
- Pry bar and hammer
- Clamps
- Nail gun or finish nails
- Safety glasses, gloves
Materials
- Stair treads
- Adhesive (construction-grade)
- Screws or nails
- Wood filler
- Sandpaper
- Stain, paint, or sealer
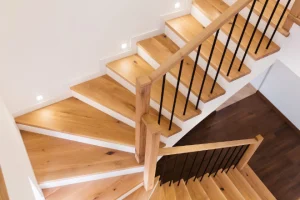
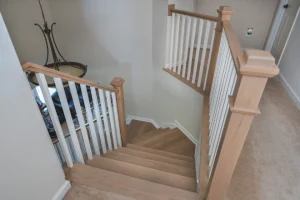
It’s helpful to know the parts of a staircase.
1. Measure for New Treads
Understand Stair Dimensions
Before you start pulling up any old tread, grab a tape measure and figure out what you’re working with.
Standard stair treads are at least 10 inches deep, and the width is usually 36 inches or more.
It’s important that each riser height is consistent, with no more than a 3/8-inch difference between steps. Uneven heights can make your stairway a trip hazard and get flagged during inspections.
Take Individual Measurements
Don’t assume every stair tread size is the same.
Even in newer homes, walls can shift, and skirt boards can throw off your sizing.
Measure each tread’s width and depth from side to side and front to back. This ensures your new tread fits like a glove and doesn’t leave a gap at the edge or along the sides.
Label your measurements so you know where each replacement piece goes later.
2. Remove Existing Treads
Use the Right Tools
To remove existing treads without damaging nearby risers or skirt boards, use a pry bar, hammer, or an oscillating multi-tool.
Score around the edges where the tread meets the wall or trim to break any paint seal.
Slide the pry bar under the old tread and gently lift it loose. If you feel resistance, check for hidden nails or recessed screws underneath.
Clear the Area
Once the tread is out, clear away leftover adhesive, old glue, or fasteners.
Check for stray nails and sweep or vacuum the area so your stringers and skirt boards are ready for the new tread.
A clean surface gives you a solid bond later and helps prevent future squeaking.
3. Inspect and Prep the Stringers
Assess Structural Integrity
Take a close look at your stringers and make sure they’re not cracked, loose, or blocked by debris.
Tap them lightly with a hammer to check for hollow spots that might suggest damage inside the wood. If the structure feels soft or unstable, stop the replacement project and repair or reinforce it before going further.
Level and Reinforce
Use a level to check that the tops of the stringers are even.
If they aren’t, use wood shims to adjust the height.
You can also add blocking between stringers if your staircase feels bouncy or if the existing span is too wide. Reinforcing now prevents problems later and makes your replacement last longer.
4. Cut New Treads to Size
Choose Materials
For a long-lasting stair tread, pick materials that can handle wear and tear.
Solid hardwood like oak or maple is a great option, though budget-minded homeowners often go with southern yellow pine or veneered plywood.
If you want to save time, you can use retrofit kits that slide over your existing treads.
Make sure the material matches your floor if you’re aiming for a seamless look.
Cut and Label Each One
Use a miter saw or circular saw to cut each piece based on the measurements you took earlier.
Cut slightly larger than your template and trim it down to fit snugly.
Label each tread so you know which stair it belongs to.
Cutting each tread to match the shape of its step helps avoid gaps, uneven overhangs, or that awkward slide when you’re walking barefoot.
5. Dry Fit Each Tread
Confirm Proper Fit
Before you glue anything down, dry-fit your new tread into place.
It should sit flat across the stringers, touch the skirt boards without forcing them apart, and leave no visible space along the sides. Make sure the nosing lines up cleanly with the other treads to keep the stairway looking sharp.
Adjust Gaps
If the fit is off, don’t guess and hope for the best.
Sand down tight spots or trim the back edge of the tread to close the gap.
Some walls bow slightly, so trimming one side more than the other can help it sit flush.
Once everything fits just right, you’re ready to install.
6. Install with Adhesive and Fasteners
Apply Adhesive Strategically
Apply construction adhesive in a serpentine line along the top of each stringer and blocking.
You don’t need to cover the whole area, but make sure the high-stress parts near the center and front edge are well bonded.
Avoid using too much glue, which can cause squeeze-out and prevent the tread from sitting flat.
Fasten Securely
Once the tread is in place, secure it with trim nails or countersunk screws.
Clamp the tread down while the adhesive cures, if needed.
If using screws, drive them in at an angle through the riser or use plugs to hide the heads.
Fastening each new tread firmly makes the stairs solid underfoot and helps the glue do its job.
7. Fill, Sand, and Finish
Clean Up Fasteners
After installing, fill any nail holes or recessed screw heads with wood filler.
Let it dry fully, then sand everything smooth. You want the surface to be even so your finish doesn’t highlight the flaws.
Apply Final Finish
You can stain the treads to match the floor or paint them for contrast.
Use a brush or rag to apply stain evenly and seal it with a durable polyurethane coat.
If painting, consider using a slip-resistant formula for safety.
Let everything dry and cure fully before walking on your new steps.
Contact us today to upgrade your stairs so you’re walking on sunshine.
Installing Stair Risers (Optional but Recommended)
Risers don’t get as much wear as stair treads, but if they’re cracked, warped, or outdated, this is a great time to replace them. Swapping them out while you’re replacing stair treads makes the whole stairway look new and consistent.
Use paint-grade wood like MDF or primed plywood, and secure each riser with adhesive and finish nails.
It’s easiest to paint or finish them before installing the new tread, then caulk the edges for a clean look.
Finishing Techniques for a Professional Look
Fill nail holes or seams with wood filler and let it dry completely, then sand smooth without rounding the nosing. This gives your treads a clean, even surface that’s ready for finishing.
Apply stain with the grain and seal with polyurethane, or paint using a durable, non-slip formula.
What’s the best finish for stair treads?
Code Requirements and Safety Considerations
Keep riser height consistent with no more than 3/8 inch of variation.
Make sure each stair tread is at least 10 inches deep.
Use nosing between ¾ and 1¼ inches unless your treads are 11 inches or more.
Wear safety gear, clamp your treads during curing, and double-check for stability before using the stairs. Small steps like these help prevent injuries and costly mistakes.
FAQs About Stair Tread Installation
Can I install new stair treads over the existing ones to save time?
Yes, you can install new stair treads over existing ones if the original treads and stringers are solid. Use a polyurethane-based construction adhesive like PL Premium or Liquid Nails, remove old molding, and secure the new treads with finish nails or screws for a fast and clean upgrade.
What type of glue or adhesive should I use for wood stair treads?
Use a polyurethane-based construction adhesive for wood stair treads. Products like Liquid Nails Heavy Duty or PL Premium provide a strong bond with minimal moisture absorption. Apply the adhesive in a zigzag pattern along the stringers and blocking to prevent squeaks and ensure a secure hold.
Is it better to install the riser or the tread first?
Install the riser before the tread for cleaner joints and better grain direction. This approach allows the tread to overlap the riser, resulting in a seamless look. Consistently following one method for all steps ensures uniformity throughout the staircase installation.
Don’t Trip Over Old Treads—Call Stair Creations
Whether you’re dealing with worn-out stair treads or planning a full stairway makeover, Stair Creations has the tools, talent, and experience to get it done right. We install beautiful, code-compliant staircases across northern Virginia that are built to last and made to impress.
If you’re ready to upgrade your stairs without cutting corners, fill out our contact form today or give us a call. Let Stair Creations help you take the next step with confidence.